Why Getting Your Downspout Attachment Right Matters
Attach downspout to vinyl siding properly using these key steps:
- Space straps every 3 feet (or every 2 feet in high-wind areas)
- Use self-sealing fasteners or screws with rubber washers to prevent leaks
- Drill through the siding into the wall structure – it’s safe when done correctly
- Don’t overtighten screws – allow room for vinyl siding to expand and contract
- Apply silicone sealant around screw holes for extra protection
If you’ve just installed new vinyl siding or noticed your downspout hanging loose, you’re probably wondering whether it’s okay to drill through that pristine siding. The good news? Yes, it’s a standard practice. The challenge is doing it right so you don’t end up with water behind your siding, buckling panels, or a downspout that rattles in the wind.
A loose downspout isn’t just annoying – it can dump hundreds of gallons of rainwater right next to your foundation, leading to basement flooding, soil erosion, and costly foundation repairs. Your gutter system only works when the downspout stays firmly attached and directs water away from your home.
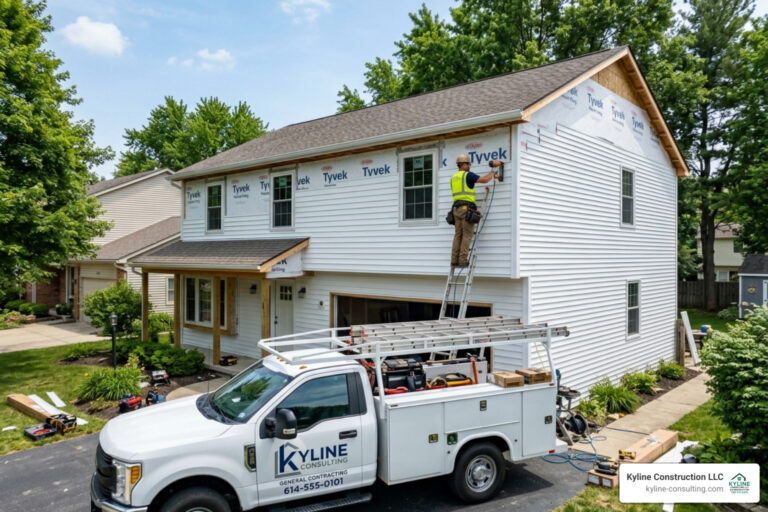
I’m Shawn Zeisler, owner of Kyline Consulting LLC, and I’ve spent my entire career in construction and exterior remodeling. I’ve helped countless Ohio homeowners attach downspout to vinyl siding correctly, preventing water damage while maintaining the integrity of their siding systems.

Why Proper Downspout Attachment is Crucial
Imagine a heavy Ohio thunderstorm. Rain pours down your roof, collects in your gutters, and then, ideally, flows neatly into your downspouts and away from your home. But what if your downspout isn’t securely attached? That torrent of water, instead of being gracefully diverted, can become a destructive force.
The primary concern when attaching a downspout to vinyl siding is preventing water intrusion. If not sealed correctly, every screw hole becomes an open invitation for moisture to seep behind your siding, reaching the sheathing and potentially the interior of your home. This can lead to insidious problems like mold growth, wood rot, and compromised structural integrity. We’ve seen how easily this can escalate into significant and costly repairs.
Another major concern is siding buckling. Vinyl siding is designed to expand and contract with temperature changes. If downspout attachments are too rigid or overtightened, they can restrict this natural movement, causing the siding panels to buckle, warp, or even crack. This not only looks unsightly but also creates new pathways for water to enter. Improper attachment can also put undue stress on the siding, leading to premature wear and tear.
Long-term consequences of improper downspout attachment can be severe. Beyond the immediate issues of water damage and buckling, you might face:
- Foundation Damage: Water pooling near the foundation can erode soil, leading to cracks in the foundation walls or even shifting.
- Basement Flooding: If water isn’t directed far enough away, it can find its way into your basement, causing water damage to belongings and creating a breeding ground for mold.
- Landscape Erosion: Your carefully maintained garden beds or lawn can be washed away by uncontrolled runoff.
- Reduced Curb Appeal: A sagging, loose, or improperly attached downspout detracts from your home’s appearance and can signal underlying problems to potential buyers.
Ensuring a proper, watertight, and flexible attachment is paramount for the longevity of your vinyl siding and the overall health of your home. It’s about protecting your investment and preventing headaches down the road. For more information on how we protect homes with durable and aesthetically pleasing exteriors, check out our Siding services.
Tools and Materials: Gearing Up for the Job
Before we dive into the nitty-gritty of installation, let’s gather our arsenal. Having the right tools and materials on hand will make the job smoother, safer, and ensure a professional finish. Think of it as preparing for battle against rainwater – you want to be well-equipped!

Here’s a list of essential tools and materials you’ll need:
- Downspout Straps: These are the unsung heroes that hold your downspout firmly to the house. We’ll discuss types in detail shortly, but make sure you have enough for your project.
- Fasteners (Screws): You’ll need specific screws designed for outdoor use and for penetrating vinyl siding and underlying sheathing. Look for self-sealing fasteners, gasketed screws, or galvanized/stainless steel screws with rubber washers.
- Exterior-Grade Silicone Sealant: A good quality, waterproof silicone sealant is crucial for sealing drilled holes and preventing water intrusion.
- Power Drill/Impact Driver: An impact driver is often preferred as it grips screws better, prevents stripping, and provides a tighter hold on downspout straps.
- Drill Bits: A set of drill bits appropriate for pre-drilling holes through vinyl siding and into wood or masonry.
- Measuring Tape: For accurate placement and spacing of your straps.
- Pencil or Marker: To mark your strap locations.
- Level or Chalk Line: To ensure your downspout is perfectly vertical and aligned.
- Tin Snips (if cutting downspout sections): For clean cuts on metal downspouts.
- Miter Saw (if cutting vinyl downspout sections): For clean cuts on vinyl downspouts.
- Safety Glasses and Gloves: Always protect your eyes and hands!
- Ladder: Ensure it’s stable and you have a helper for safety, especially for two-story homes.
The quality of your materials directly impacts the longevity and stability of your downspout attachment. Investing in good fasteners and sealant now will save you headaches and potential repairs later.
How to Attach Downspout to Vinyl Siding: A Step-by-Step Guide
Now that we’ve gathered our gear, let’s walk through the process of how to attach downspout to vinyl siding correctly. This isn’t just about screwing things into place; it’s about thoughtful planning, precise execution, and ensuring your home remains protected for years to come.
Step 1: Plan Your Strap Placement
Strategic placement of your downspout straps is crucial for stability and proper water management. Think of these straps as the backbone of your downspout system.
- The 3-Foot Rule: The general consensus and best practice is to place downspout straps every 3 feet along the length of the downspout. This provides ample support against wind, rain, and even accidental bumps.
- Adjusting for Height and Wind: For a one-story home (approximately 10 feet of downspout), you’ll typically need 3-4 straps. For a two-story home (around 20 feet), aim for 6-7 straps. Taller homes or those in high-wind areas, like some parts of Ohio experiencing stronger weather patterns, may require straps every 2 feet for improved stability.
- Seam Placement: Always try to place a strap directly over any seams where two downspout sections or an elbow and a straight section connect. This adds significant strength to these vulnerable points.
- Rain Barrel Connections: If you’re rerouting your downspout to connect to a rain barrel or other rainwater harvesting system, we recommend adding an extra strap near the bottom of the downspout, just above the connection point. This provides additional support for the added weight and potential movement.
- Short Downspouts: Even short downspouts (3-4 feet) need proper securing. At least one strap at the top and one at the bottom is recommended.
- Marking Locations: Once you’ve determined your spacing, use your measuring tape and pencil to clearly mark where each strap will go. Ensure your marks are aligned vertically using a level or chalk line for a neat appearance and optimal function.
Careful planning here prevents a wobbly downspout and ensures even distribution of stress, keeping your siding and downspout happy.
Step 2: The Right Way to Drill into Vinyl Siding
This is often where homeowners get nervous. “Can I really drill into my vinyl siding?” The answer is a resounding yes, but there’s a right way to do it to prevent issues like buckling and water intrusion. It is fine to make holes through vinyl siding for downspout strap hardware to penetrate into the structure behind.
Here’s how we approach it:
- Locate the Structure: Your goal isn’t just to screw into the vinyl siding; it’s to secure the downspout strap to the solid structure behind the siding, typically a wall stud or plywood sheathing. If you can locate a stud, that’s ideal. If not, you’ll be drilling into the sheathing.
- Pre-Drill Carefully: Use a drill bit slightly larger than the shank of your screw, but smaller than the screw threads. This allows the screw to bite firmly into the wood while creating a minimal hole in the siding.
- Allow for Expansion: Vinyl siding needs to breathe. When you drill, avoid overtightening the screws later. The hole should allow for a tiny bit of play. Some experts recommend mounting the bracket high-up, tucked under a siding lap, where the siding naturally has more room to move, to further prevent buckling. When installing siding, a larger distance between fasteners is accompanied with expansion applications and is more important to allow for expansion.
- Seal the Deal: This step is non-negotiable. Before driving any screws, apply a generous dab of exterior-grade silicone sealant into the pre-drilled hole. This creates a watertight seal, protecting the sheathing and house wrap from any moisture that might try to sneak past. Self-sealing fasteners or screws with rubber washers offer an extra layer of protection against leaks.
- Protecting the Sheathing: The house wrap, which is behind your siding, is your first line of defense against water. By sealing the screw hole, you ensure that even if water gets behind the vinyl, it won’t have a direct path into your wall cavity.
Drilling into vinyl siding for downspout attachment is a common and accepted practice. The key is to do it thoughtfully, focusing on sealing and allowing for the siding’s natural movement. For comprehensive protection of your home’s exterior, including the critical role of your roof in water management, explore our Roofing services.
Step 3: How to Securely Attach a Downspout to Vinyl Siding
With your holes prepped and sealed, it’s time to bring everything together. This is where your downspout goes from leaning against the house to becoming a firmly anchored part of your home’s water management system.
- Wrap the Strap: Take your chosen downspout strap and wrap it around the downspout. Ensure the decorative side (if any) is facing outwards.
- Align the Downspout: Position the downspout so it’s perfectly vertical, using your level as a guide. The strap should be flush against the vinyl siding at your marked locations.
- Drive the Screws: Using your power drill or impact driver, carefully drive your chosen screws through the strap, through the pre-drilled and sealed hole in the vinyl siding, and into the underlying wall structure.
- The “Not Overtightening” Mantra: This is critical for vinyl siding. Drive the screws until they are snug, but do not overtighten them. You want the strap to hold the downspout firmly, but you don’t want to compress or dent the vinyl siding. Leave just a tiny bit of play to allow the siding to expand and contract. This prevents the dreaded buckling we discussed earlier.
- Two Screws per Strap: For maximum stability, use two screws per strap, one on each side of the downspout. This distributes the load and prevents the downspout from twisting or shifting.
- Check for Stability: Once all straps are attached, give the downspout a gentle shake. It should feel solid and secure, with no noticeable wobble.
- Final Inspection: Step back and admire your work! Ensure the downspout is straight, all straps are evenly spaced, and everything looks aesthetically pleasing.
By following these steps, you’ve not only attached your downspout but done so in a way that respects the integrity of your vinyl siding and ensures long-term performance.
Choosing the Best Hardware and Fasteners
The longevity and stability of your downspout attachment heavily rely on the quality and type of hardware you choose. It’s not just about what you use, but why you use it. We’re looking for material durability, weather resistance, and a secure hold that can withstand Ohio’s varied weather conditions.
Downspout Straps: What to Look For
Downspout straps are the primary means of securing the downspout to your home. While they might seem simple, there’s a clear winner in terms of performance and durability.
| Feature | Metal Straps (Galvanized/Stainless Steel) | Plastic Straps |
|---|---|---|
| Longevity | Decades; highly durable | Few seasons; prone to becoming brittle |
| Durability | Holds up in extreme weather | Can crack, snap, or degrade with UV exposure |
| Security | Maximum support; strong hold | Less secure; can snap under pressure |
| Aesthetics | Often look better, more substantial | Can look cheap or degrade in appearance |
- Metal Straps: We strongly recommend galvanized or stainless steel straps for long-term durability. These materials are built to last decades, holding up exceptionally well against extreme weather, UV exposure, and temperature fluctuations. They provide maximum support, wrapping fully around the downspout for a secure hold.
- Plastic Straps: While cheaper upfront, plastic straps are often a recipe for future headaches. They can become brittle and crack within a few seasons, especially with Ohio’s freezing winters and hot summers. They offer less security and are prone to snapping under pressure, leading to loose downspouts and potential damage. As the experts say, “If you want to replace your downspouts every couple of years,” then use clips or plastic straps. But we’re building for the long haul!
The choice is clear: opt for robust metal straps for a truly secure and lasting downspout attachment.
The Best Screws to Attach a Downspout to Vinyl Siding
Just like straps, the right screws are essential for a reliable attachment and to prevent water intrusion.
- Self-Sealing Fasteners: These are fantastic for vinyl siding. They are designed to create a watertight seal as they are driven in, minimizing the risk of leaks.
- Gasketed Screws: Similar to self-sealing fasteners, gasketed screws come with an integrated rubber washer that compresses upon installation, forming a watertight barrier. While some might consider them “overkill,” we believe in comprehensive protection for your home.
- Galvanized or Stainless Steel Screws: These materials are crucial for rust resistance. Screws that rust will eventually fail, weakening the attachment and leaving unsightly stains on your siding. Galvanized screws with rubber washers create an excellent watertight seal and last longer.
- Screw Length: Ensure your screws are long enough to penetrate through the downspout strap, the vinyl siding, the sheathing, and ideally, into a wall stud for the most secure hold. A 1 1/2-inch zip screw is often recommended for attaching mounting straps through vinyl siding. Screws with a fully threaded shank are recommended for attaching to plywood.
- Silicone Sealant: As mentioned in our drilling step, even with the best screws, applying a dab of exterior-grade silicone sealant to every pre-drilled hole before driving the screw adds an extra layer of watertight protection.
By combining durable metal straps with high-quality, rust-resistant, and self-sealing fasteners, you’ll ensure your downspouts remain firmly attached, year after year, effectively diverting water away from your cherished Ohio home.
Frequently Asked Questions about Downspout Installation
We’ve covered the step-by-step process, but let’s address some of the common questions and concerns homeowners have when considering how to attach downspout to vinyl siding.
Can you screw directly into vinyl siding?
Yes, you absolutely can screw directly into vinyl siding, and it’s a common, accepted industry practice. Many homeowners worry about perforating their siding, but when done correctly, it doesn’t pose a problem. The key is to ensure the screw penetrates through the vinyl siding and into the solid structure behind it (like the sheathing or a wall stud).
The critical part is preventing water intrusion. This is achieved by:
- Pre-drilling a pilot hole: This creates a clean entry point.
- Applying silicone sealant: A dab of exterior-grade silicone sealant in the hole before driving the screw creates a watertight barrier.
- Using appropriate fasteners: Self-sealing fasteners or screws with rubber washers add an extra layer of protection.
As one expert noted, “It is fine to make holes through vinyl siding for downspout strap hardware to penetrate into the structure behind.” The house wrap behind your siding is designed to handle some moisture, and a properly sealed screw hole won’t compromise that system.
How do you prevent vinyl siding from buckling?
Preventing vinyl siding from buckling is all about respecting its natural movement. Vinyl expands and contracts significantly with temperature changes. If your downspout attachments are too rigid, they can restrict this movement, leading to unsightly (and damaging) buckling.
Here’s how we ensure your siding stays smooth:
- Do Not Overtighten Fasteners: This is the golden rule. Drive screws until they are snug, but avoid compressing or denting the vinyl siding. Leave a tiny bit of play. The siding needs room to “breathe” around the attachment point.
- Allow for Siding Movement: Affix the downspout bracket in the middle of a siding panel with room on both sides to allow for its expansion and contraction.
- Mount Under a Lap: If possible, mount downspout brackets high up, tucked under a siding lap. This position often provides more inherent flexibility for the siding.
- Check for Play: Before final tightening, gently check the siding for any natural “play” or movement. This helps you understand how much give the material needs.
While attaching a downspout does create a fixed point, the small area involved (typically only a few inches between screws) means the expansion is minimal and generally won’t cause major issues if you avoid overtightening.
How many straps does a downspout need?
The number of straps your downspout needs depends primarily on its length and the local weather conditions. A good rule of thumb is to ensure adequate support and stability.
- General Rule: One downspout strap every 3 feet is the standard recommendation.
- One-Story Homes: For a typical one-story home with approximately 10 feet of downspout, 3-4 straps are usually sufficient.
- Two-Story Homes: For a two-story home, which might have around 20 feet of downspout, you’ll need 6-7 straps.
- Three-Story Homes: A three-story home with roughly 30 feet of downspout would require 9-10 straps.
- High-Wind Areas or Taller Homes: If your home is particularly tall or located in an area prone to high winds (common in parts of Ohio), consider increasing the frequency to a strap every 2 feet for added security.
- Short Downspouts: Even short downspouts (3-4 feet long) need proper anchoring. We recommend at least one strap at the top and one at the bottom.
- Rain Barrel/Extension Connections: If you’re connecting your downspout to a rain barrel or using a downspout extender, add an extra strap at the bottom, just above the connection point, to support the added weight and potential leverage.
Proper spacing ensures your downspout remains stable, preventing it from flapping in the wind or detaching during heavy rainfall, and ultimately helping to prevent water damage around your home.
Protect Your Home with a Professional Touch
Attaching downspouts to vinyl siding is a DIY project that many homeowners can tackle. However, as we’ve explored, there are critical details involved in ensuring proper installation that protects your home from water damage and maintains the integrity of your siding. From choosing the right fasteners to understanding how vinyl siding moves, every step plays a vital role in the longevity and stability of your gutter system.
Proper installation isn’t just about functionality; it’s about safeguarding your investment. The benefits of a correctly attached downspout system include:
- Long-Term Stability: Your downspouts will withstand the elements, directing water away from your foundation for years to come.
- Avoiding Costly Repairs: By preventing water intrusion, buckling siding, and foundation issues, you save yourself from expensive future headaches.
- Improved Curb Appeal: A neatly installed downspout system contributes to the overall aesthetic of your home.
At Kyline Construction LLC, we bring over 40 years of experienced professionals to every project, ensuring quality and safety. We understand the unique challenges and best practices for Ohio homes, and we’re committed to providing solutions that last. If you have any doubts about tackling this project yourself, or if you’re looking for comprehensive exterior home improvement services, we’re here to help. We offer free, no-obligation estimates to discuss your needs and provide expert guidance.
Don’t let a loose downspout turn into a costly problem. Protect your home with precision craftsmanship. Contact us today to learn more about our Siding services and how we can help you maintain a beautiful and well-protected home in Circleville, Columbus, and throughout Ohio.