Why Cutting Vinyl Siding Corners Matters for Your Home
Cutting vinyl siding corners is a critical skill for a professional-looking siding installation. Whether for a DIY repair or a full exterior refresh, knowing how to properly measure, mark, and cut corners prevents visible gaps and moisture problems, ensuring a weather-tight, attractive finish.
Quick Answer: How to Cut Vinyl Siding Corners
- Measure twice – Account for 1/4-inch expansion gaps at all connection points.
- Mark your cut line on the back of the panel using a carpenter’s square for accuracy.
- Choose your cutting method – Use a utility knife for scoring, tin snips for notches, or a vinyl siding cutter for straight cuts.
- Cut with control – Make steady, deliberate cuts to avoid chipping or cracking.
- Test-fit before installing – Verify the piece fits properly with room for expansion.
Your siding’s corner pieces are its most visible and vulnerable spots, facing constant exposure to the elements. A poorly cut corner creates gaps, allowing water to damage your home’s structure and insulation while hurting its curb appeal.
Many find corner cuts intimidating because vinyl expands and contracts with temperature, can crack under force, and requires specific techniques to prevent chipping. However, with the right tools and methods, you can achieve clean, professional corners that last for decades.
I’m Shawn Z of Kyline Construction LLC. My career in exterior remodeling has taught me the best techniques for cutting vinyl siding corners, learned from countless real-world projects.

Essential Tools and Safety for the Job
Before you start cutting vinyl siding corners, you need the right tools and safety gear. Proper equipment is half the battle, and using it safely is the other.
The Right Tools for a Clean Cut
Choosing the right tool is key for a clean, professional finish. Here’s what we recommend:
- Utility Knife with Hook Blades: Our go-to for straight cuts. Score the vinyl deeply along your cut line, then bend the siding to snap it cleanly. This method is excellent for precise, long, straight cuts.
- Tin Snips (or Aviation Snips): Fantastic for intricate cuts around corners and edges. They offer great control for trimming, navigating obstacles, and making curved cuts. For a cleaner result, close the jaws only two-thirds of the way on each cut.
- Vinyl Siding Cutter (Guillotine Style): For speed on straight cuts, a dedicated vinyl siding cutter is ideal. It provides clean cuts and reduces the risk of cracking. Simply position the siding on the marked line and squeeze the handles.
- Jigsaw with a Fine-Toothed Blade: Useful for cutting already-installed siding. It allows for precise cuts in place for detailed work or modifications.
- Siding Removal Tool / Zip Tool: Invaluable for safely opening existing panels to access sections for cutting or replacement. A rotary tool with a mini saw blade also works well for curved cuts on hanging siding.
Here’s a quick comparison to help you choose the right tool:
| Tool | Pros | Cons | Best Use Cases |
|---|---|---|---|
| Utility Knife | Great for straight cuts, scoring/snapping; inexpensive. | Tiring for long cuts; requires multiple passes; not for curves. | Straight edge cuts, scoring before snapping. |
| Tin Snips | Versatile for curves and intricate shapes; precise control. | Can leave jagged edges; slower for long straight cuts. | Trimming around obstacles, notching, curved cuts. |
| Vinyl Siding Cutter | Clean, fast straight cuts; reduces cracking risk. | Only straight cuts; bulky; may require multiple passes on thick siding. | Long, straight cuts; high-volume straight cuts. |
| Jigsaw / Rotary Tool | Cuts installed siding; good for in-place curves; handles thick material. | Can melt vinyl or leave rough edges; risks underlying damage. | Cutting installed panels, creating openings for vents or pipes. |
Safety First: Protecting Yourself on the Job
Siding work involves sharp tools and flying debris. Your safety is the top priority.
- Safety Goggles/Eye Protection: Always wear safety goggles to protect your eyes from flying vinyl chips.
- Work Gloves: Wear work gloves (cut-resistant are best) to protect your hands from sharp edges.
- Dust Mask: It’s good practice to wear a dust mask, especially when using power tools.
- Stable Work Surface and Secure Footing: Use a stable work surface and secure the siding. Ensure ladders or scaffolding are on firm, level ground.
- Sharp Blades: A sharp blade is safer and cuts cleaner. Dull blades tear vinyl and require more force, increasing injury risk. Keep your tools sharp.
The Step-by-Step Process for Cutting Vinyl Siding Corners
Perfectly cut vinyl siding corners require careful measurement, marking, and cutting. Our team prides itself on the precision craftsmanship that ensures a water-tight seal and a beautiful finish for Ohio homes.
Step 1: Accurate Measuring and Marking
This is the most crucial step. “Measure twice, cut once” saves material, time, and frustration.
- Understand Expansion and Contraction: Vinyl siding expands and contracts with temperature. This is critical when cutting vinyl siding corners. Leave a 1/4-inch expansion gap at all connection points (trim, corner posts). For a panel between two J-channels, measure the distance and subtract 1/2 inch (1/4 inch per end).
- Use the Right Tools: Use a reliable tape measure and a carpenter’s or speed square to mark accurate, perpendicular cut lines.
- Measure Accurately: Measure the installation area. For new work, measure between corner posts or to a frame. For repairs, measure the replacement piece exactly.
- Mark on the Back: Always mark cut lines on the back of the panel to prevent visible marks or chipping on the face. Use a pencil for clear lines.
- Consider Temperature: In cold weather, vinyl is brittle and can crack; cut in a warmer area or let the siding warm up. In hot weather, vinyl is softer but still needs careful handling.
For more detailed information on how our siding services can transform your home, visit our page: More info about our siding services.
Step 2: Achieving Clean Cuts on New Siding Panels
With markings complete, it’s time to cut. Your method depends on the cut type and your tools.
- Score-and-Snap Method (Utility Knife): This method creates clean, straight cuts. Place the panel on a flat surface, marked side up. Align a straightedge with your cut line. Using a utility knife with a hook blade, score deeply along the line with firm pressure, making multiple passes if needed. Bend the siding backward along the score line until it snaps cleanly.
- Tin Snips for Notches and Curves: Tin snips are ideal for intricate cuts and notches. Outline the shape on the back of the siding. Cut along the line with small, controlled snips, closing the jaws only two-thirds of the way to prevent distortion. They also provide the precision needed for relief cuts.
- Vinyl Siding Cutter for Straight Cuts: For quick, straight cuts, a vinyl siding cutter is highly efficient. Align the marked line with the blade and squeeze firmly for a clean cut.
If you’re new to these techniques, practice on scrap pieces to build confidence.
To see a visual guide on how to handle corner work, you can watch this demonstration: See a demonstration of corner replacement.
Step 3: Techniques for cutting vinyl siding corners on existing walls
Cutting installed siding is sometimes necessary for repairs or new fixtures. This requires finesse to avoid damaging adjacent panels or the house wrap.
- Gaining Access: First, use a siding removal tool to carefully unhook and lift panels without damage. This provides better access for cutting.
- Jigsaw with a Fine-Tooth Blade: A jigsaw with a fine-toothed blade is a powerful option for cutting installed siding. Set the blade depth to cut only through the vinyl, being careful not to damage the house wrap or sheathing behind it.
- Rotary Tool / Zip Tool: A rotary tool with a mini saw blade offers great control for intricate or curved cuts on installed siding, especially around obstacles like pipes or vents.
- Careful Execution: Cutting installed siding requires a steady hand. Mark lines precisely, take your time, and protect the underlying house wrap to maintain the home’s weather barrier.
Advanced Techniques and Common Mistakes to Avoid
Understanding vinyl’s nuances and avoiding common pitfalls is key to a lasting, beautiful finish.
Handling Different Types and Conditions of Vinyl Siding
Vinyl siding types and conditions affect how it cuts.
- Insulated Vinyl Siding and Thicker Profiles: Insulated vinyl siding’s thicker profile and foam backing present a cutting challenge. You may need a deeper score with a utility knife or use a jigsaw for the foam. A vinyl siding cutter might require multiple passes or more pressure.
- Temperature Impact on Cutting: Temperature greatly impacts vinyl.
- Cutting in Cold Weather: In cold weather, vinyl becomes brittle and prone to cracking. If possible, cut panels in a warmer area. If cutting in the cold, use very sharp blades and extra caution. You can warm panels slightly with a heat gun (from a safe distance), but avoid overheating and distorting the material.
- Cutting in Hot Weather: In extreme heat, vinyl softens. This reduces cracking risk but can lead to melting with high-speed power tools or distortion if unsupported. Work slowly and steadily.
Common Mistakes When cutting vinyl siding corners and How to Prevent Them
Here are the most common mistakes we see and how to avoid them:
- Using Dull Blades: This is a frequent error. Dull blades tear and fray vinyl instead of cutting cleanly, leading to jagged edges and a poor seal.
- Prevention: Always use sharp blades. Replace utility knife blades frequently and keep snips sharp.
- Forgetting Expansion Gaps: Forgetting the 1/4-inch expansion gap at all connection points (corners, J-channels) will cause the siding to buckle or crack as temperatures change.
- Prevention: Measure twice and always subtract the necessary expansion allowance.
- Inaccurate Measurements: “Eyeballing” cuts leads to gaps, overlaps, and unsightly seams.
- Prevention: Use a tape measure and carpenter’s square for every measurement. Double-check before you cut.
- Forcing the Cut: Forcing a cut with a dull blade or on a poorly scored piece leads to cracking and uneven lines.
- Prevention: Let the tool do the work. Use a sharp blade and proper technique.
- Over-Tightening Fasteners: This is an installation issue, but crucial. Nailing siding too tightly restricts its movement, causing buckling.
- Prevention: Center nails in the nailing slots and leave a 1/32-inch gap between the nail head and the siding, allowing the panel to move.
Frequently Asked Questions about Cutting Siding
Here are answers to common questions about cutting vinyl siding corners:
How do you seal cut vinyl siding corners to prevent water damage?
Properly sealing cut corners is vital to prevent moisture damage. It’s about how the entire system works together.
- Proper Flashing and House Wrap Integration: The first defense is proper house wrap installation. At corners, the wrap must be seamless and overlapped to create a continuous barrier. Ensure new corner posts are properly flashed and integrated with the house wrap.
- High-Quality Exterior Caulk: Use a high-quality, flexible, exterior-grade caulk to seal small gaps where cut vinyl meets trim or other materials. Apply it sparingly.
- Weep Holes: Vinyl siding accessories often have “weep holes” to let moisture escape. Do not seal these holes; they are crucial for water diversion.
- Preventing Moisture Intrusion: The goal is a system that prevents water penetration. Ensure all cut edges are covered by trim or J-channel, and that exposed areas are sealed or flashed.
How do different cutting methods affect the final look and durability?
The cutting method impacts the final look and durability of your corners.
- Utility Knife (Score-and-Snap): This method produces a very clean, straight break. A smooth edge looks professional and is less prone to future chipping.
- Tin Snips: Tin snips offer great control for intricate cuts. The edge is clean if the snips are sharp and used correctly. A smooth cut ensures durability.
- Jigsaw: A jigsaw is effective for installed or thick siding, but can melt vinyl or leave rough edges if the blade speed is too high or the blade isn’t fine-toothed. A rough edge is unsightly and less durable.
- Tool Sharpness is Key: Tool sharpness is the biggest factor for look and durability. Sharp tools make clean cuts that fit and last. Dull tools create a substandard finish.
Can I cut a vinyl corner post that is already installed?
Yes, you can cut an installed corner post, but it requires careful planning. This is often needed for deck ledgers or other modifications.
- Assess and Mark: First, determine the reason for the cut and mark the line precisely on the post using a square and pencil.
- Gain Access: Use a siding removal tool to open adjacent panels for better access if needed.
- Choose Your Tool:
- Jigsaw with a Fine-Tooth Blade: A common choice. The fine-tooth blade minimizes chipping. Control the speed to prevent melting.
- Rotary Tool: Offers excellent control for smaller, intricate cuts.
- Tin Snips: Can be used for thinner sections or relief cuts.
- Cut Carefully: A steady hand is crucial. Be careful not to cut the underlying house wrap or sheathing. A thin piece of metal behind the post can act as a protector.
- Finish and Seal: After cutting, smooth any rough spots. Properly seal and flash the area to prevent water intrusion, using high-quality exterior caulk or flashing tape. If you’re unsure, consult a professional.
When to Call a Professional for Your Siding Project
While this guide helps with cutting vinyl siding corners, sometimes hiring an expert is the smartest decision for your Ohio home.
- Complex Architecture: Homes with intricate angles, dormers, or bay windows require substantial precision. A simple corner can become a puzzle of compound angles.
- Large-Scale Projects: A full re-siding is a significant undertaking. The volume of work can be overwhelming for a DIYer. Professionals have the tools and experience to complete large projects efficiently.
- Lack of Tools or Experience: If you lack the right tools or experience, the learning curve is steep. Buying tools for one project isn’t always cost-effective, and mistakes lead to wasted material.
- Safety Concerns: Working at heights on ladders or scaffolding is risky. If you’re uncomfortable or lack safety equipment, leave it to trained professionals.
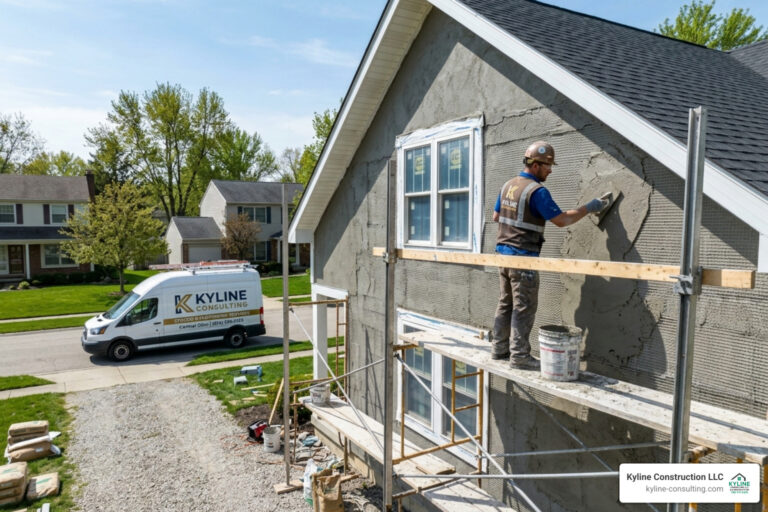
- Valuing Experience and Craftsmanship: At Kyline Construction LLC, our team brings over 40 years of professional experience to every job. We deliver precision craftsmanship, handling every detail to ensure a beautiful, durable, and weather-tight finish that protects your investment and boosts curb appeal.
If you’re considering a siding project for your home in Circleville, Columbus, or anywhere across Ohio, and you want the peace of mind that comes with professional expertise, we’re here to help. We offer free, no-obligation estimates, so you can understand the scope and cost of your project without any commitment. Get a free, no-obligation estimate for your siding project.