Why Safe, Beautiful Deck Railings Matter
Deck railing installation is more than just a finishing touch—it’s a critical safety feature that prevents falls, protects your family, and ensures your outdoor space meets legal requirements. Whether you’re adding railings to a brand-new deck or replacing an old system that’s seen better days, the installation process involves careful planning, precise measurements, and a solid understanding of your local building codes.
Here’s what you need to know to install deck railing successfully:
- Check local codes first – Most areas require railings on decks over 30 inches high, with specific rules for height (typically 36″ or 42″) and baluster spacing (4-inch sphere rule).
- Choose your material – Wood, composite, aluminum, cable, and glass each offer different benefits for durability, maintenance, and appearance.
- Secure posts properly – Posts must be bolted to the deck’s structural joists, not just the surface boards, and spaced no more than 6 feet apart.
- Measure twice, cut once – Accurate measurements for rails and consistent baluster spacing are essential for both safety and a professional look.
- Don’t skip the prep work – Inspect your deck frame, add blocking where needed, and gather all tools before you start.
Installing deck railing isn’t rocket science, but it does demand attention to detail and respect for the job at hand. A well-installed railing can prevent serious accidents, add curb appeal to your home, and even increase your property value. On the flip side, improper installation can lead to fines, failed inspections, or worse—someone getting hurt.
The good news? With the right guidance and a bit of patience, this is a project many homeowners can tackle themselves. Or, if you’d rather leave it to someone who does this every day, that’s a smart call too.
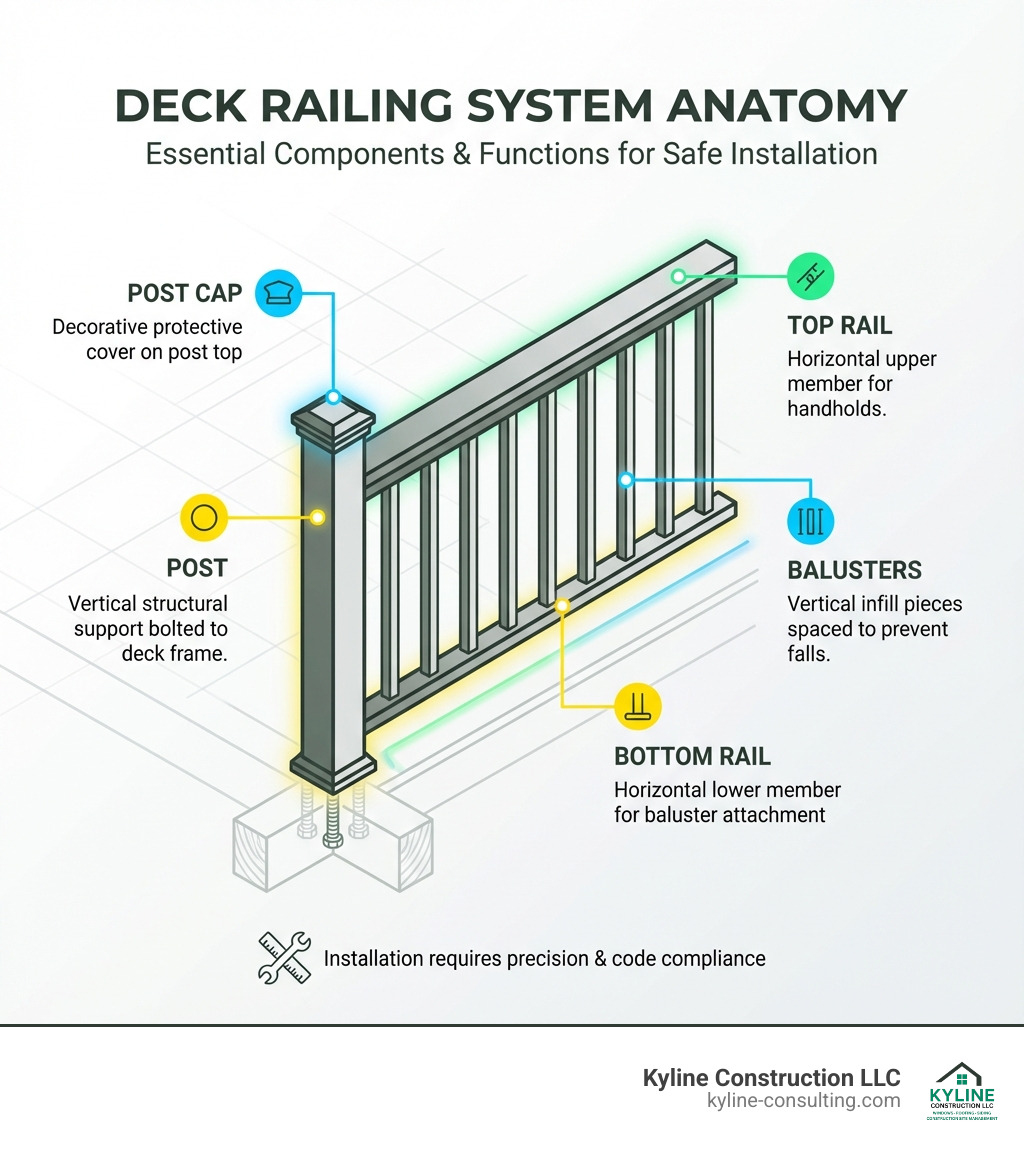
Before You Begin: Planning Your Deck Railing Project
Before we even think about picking up a drill, a successful deck railing installation starts with solid planning. Just like building a house requires a blueprint, installing a railing needs a clear vision and a thorough understanding of the groundwork. This initial phase is where we make critical decisions about materials, tools, and, most importantly, safety and code compliance.
Understanding Building Codes and Safety First
Safety isn’t just a suggestion; it’s the foundation of every project we undertake at Kyline Consulting. When it comes to deck railings, local building codes in places like Circleville and Columbus, Ohio, are your best friend. They’re designed to keep everyone safe, and ignoring them can lead to serious consequences.
We always start by checking with local building inspectors for specific requirements in your area. This includes obtaining any necessary permits before we even begin. Common railing height rules usually mandate either 36″ or 42″ for decks above a certain height (often 30 inches from the ground). A crucial safety measure is the “4-inch sphere rule” for baluster spacing, meaning no gap in your railing should be large enough for a 4-inch diameter sphere to pass through. This prevents small children from falling through. For stair railings, there’s a similar rule: a 6-inch ball must not pass through the triangle formed by the bottom rail, tread, and riser.
Beyond codes, personal safety is paramount. Always wear appropriate Personal Protective Equipment (PPE) like eye protection, ear protection, gloves, long pants, a long-sleeved shirt, and reinforced toe shoes. Keep a first aid kit nearby, because even the most careful carpenter can have a mishap. If you’re working with pressure-treated lumber, which is common for deck frames, it’s wise to be aware of the chemicals involved. You can Learn about pressure-treated lumber safety to ensure you’re handling it properly.
Choosing Your Railing Material
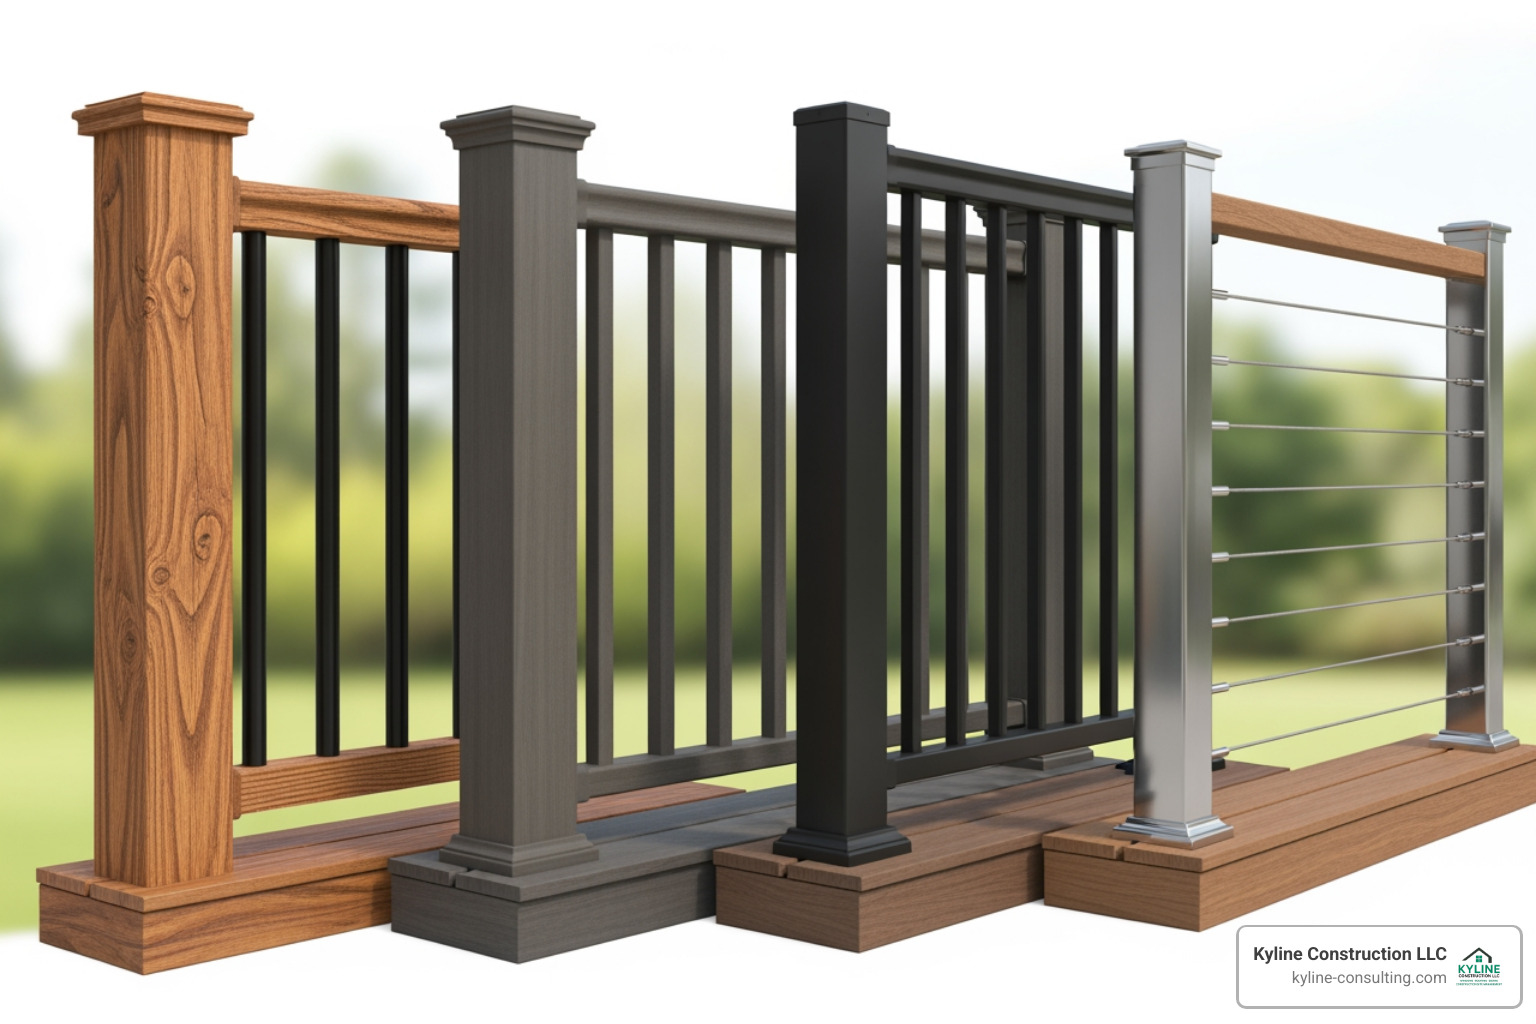
The material you choose for your deck railing will impact its durability, maintenance, cost, and overall aesthetic. Each option has its own charm and challenges. Here’s a quick comparison to help you decide:
| Material | Durability | Maintenance | Cost (relative) | Aesthetics | Pros | Cons |
|---|---|---|---|---|---|---|
| Wood | Moderate | High (staining, sealing) | Low-Moderate | Warm, natural, traditional, customizable | Easy to work with, natural look, customizable. | Requires regular maintenance (staining/painting), prone to rot/insects without proper treatment. |
| Composite | High | Low (cleaning) | Moderate-High | Wood-look, modern | Low maintenance, resistant to rot/insects, durable, consistent appearance. | Higher upfront cost, can fade over time, can get hot in direct sun. |
| Vinyl | High | Very Low (cleaning) | Low-Moderate | Clean, classic, often white | Very low maintenance, affordable, does not rot/rust. | Can look less substantial than other materials, limited color options, can become brittle in extreme cold. |
| Aluminum | Very High | Low (cleaning) | Moderate-High | Sleek, modern, industrial | Strong, rust-proof, lightweight, durable, minimal maintenance, often engineered for easy installation. | Can be more expensive than wood/vinyl, limited customization for infill, can get hot in direct sun. |
| Glass | High (panels) | Moderate (cleaning, prone to smudges) | High | Modern, unobstructed views, neat | Unobstructed views, modern aesthetic, durable. | High cost, requires frequent cleaning, can be heavy, specific installation requirements for post spacing. |
| Cable | Very High (stainless) | Low (tensioning, cleaning) | High | Modern, minimalist, industrial | Durable, slim profile, excellent views, contemporary look. | High cost, tensioning required, can be complex to install correctly, specific post spacing. |
For us, wood railings offer that warm, natural aesthetic that many homeowners love, and they’re easy to customize. However, they do require regular staining or painting to protect them from Ohio’s weather. Composite railings, like Trex Improve®, give you the look of wood with significantly less maintenance, which is a huge plus for busy families. Aluminum railings provide a sleek, modern look and are incredibly durable, resisting rust and requiring minimal upkeep. Glass and cable railings are fantastic for those who want an unobstructed view and a truly modern feel, but they come with a higher price tag and more specific installation nuances.
Gathering Your Tools and Materials
Having the right tools can make all the difference, turning a frustrating project into a smooth, enjoyable one. Here’s what we typically have on hand for a deck railing installation:
Essential Tools:
- Tape Measure (a good, sturdy one!)
- Level (a 4-foot level is ideal for posts)
- Cordless Drill/Driver (with extra batteries)
- Circular Saw (with appropriate blades for your material)
- Jigsaw (for any intricate cuts around posts)
- Clamps (to hold pieces in place while fastening)
- Speed Square and Framing Square
- Carpenter’s Pencil or Marker
- Rubber Mallet (for gentle persuasion)
- Safety Glasses, Gloves, Ear Protection (PPE is not optional!)
- Chalk Line (for marking)
- Post Level (a handy tool for ensuring plumb posts)
- Socket Wrench (for carriage bolts)
Materials Checklist:
- Railing Posts (4x4s, aluminum posts, etc.)
- Top Rails and Bottom Rails
- Balusters, Glass Panels, or Cable Infill (and all associated connectors/hardware)
- Post Sleeves (if using composite or vinyl over wood posts)
- Post Caps (decorative and protective)
- Fasteners: Deck screws (stainless steel or hot-dipped galvanized are a must for treated lumber!), carriage bolts with washers and nuts, structural wood screws.
- Support Blocks (for longer rail spans)
- Silicone Caulk (for baluster connectors or post caps in high wind areas)
- Touch-up Paint (for cut metal surfaces)
- Shims (for leveling posts)
If you’re using pressure-treated lumber for your posts or deck frame, it’s absolutely critical to use fasteners and hardware rated for treated lumber. Stainless-steel or hot-dipped galvanized screws and bolts will prevent corrosion and ensure your railing’s longevity.
Preparing Your Deck for Installation
Before we start drilling holes or cutting lumber, we need to make sure the deck itself is ready for its new railing. This involves a thorough inspection of the deck frame. Look for any signs of rot, loose boards, or structural damage. If you find any, address them now, before you build on top of them.
Next, we need to understand the deck’s structure, especially where the joists are located. Railing posts must be securely attached to these structural elements, not just the surface decking. Sometimes, we’ll need to add blocking—additional pieces of lumber installed between joists—to provide a solid anchor point for your posts. This is crucial for the strength and stability of your railing. If you’re unsure about your deck’s structure or need help reinforcing it, that’s where our 40+ years of experience at Kyline Consulting comes in handy.
Finally, clear the work area. Remove any furniture, planters, or debris. Give the deck a good sweep. Then, use a chalk line to mark the precise locations where each post will be installed. This helps visualize the layout and ensures consistent spacing.
The Step-by-Step Guide to Deck Railing Installation
Now that we’ve done all the essential planning and prep work, it’s time to get down to the exciting part: the actual deck railing installation. This is where your vision starts to take shape, and we begin to build a beautiful, safe perimeter for your outdoor oasis.
Step 1: A Guide to a Perfect Post Installation
The posts are the backbone of your railing system, so getting them right is non-negotiable. Most building codes, including those we work with in Ohio, permit a maximum post spacing of 6 feet on center. We always aim for consistent spacing, even if it means adjusting slightly to fit a particular deck length.
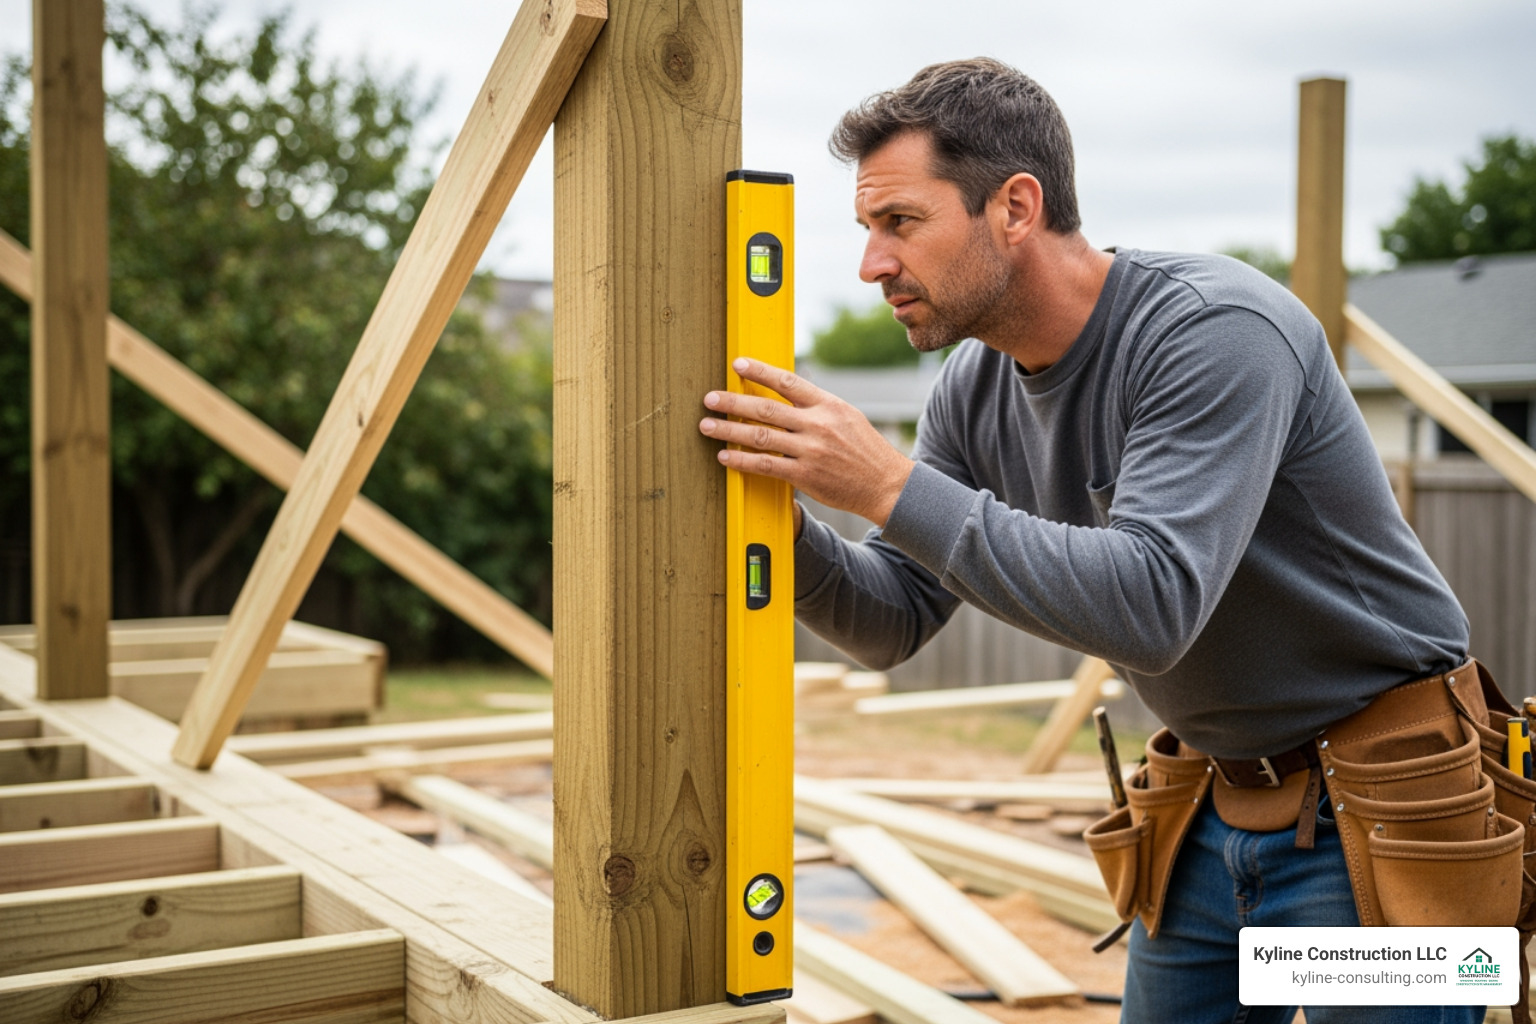
The most critical rule here is how we attach the posts. They must be bolted to the deck’s structural frame (the joists or rim joists), not just the surface deck boards. Attaching posts only to the decking significantly weakens the entire system and is a major safety hazard. For a truly secure connection, we use galvanized carriage bolts that pass through both the post and the joist, secured with washers and nuts. A common mistake is to reduce the strength of the post by notching it; we never recommend this, as it can lead to failure. If you’re installing on a new deck, it’s often easiest to install the railing posts before the deck boards are fastened, as this gives us better access to the joists.
When installing, we position the post, then use a level to ensure it’s perfectly plumb (vertical) in both directions. Clamps are incredibly useful for holding the post in place while we drill pilot holes and secure the bolts. For decks built over concrete patios, the fastening methods will differ, requiring specialized anchors designed for concrete, but the principle of strong structural attachment remains the same.
If you’re looking for more information on how we build and secure decks, including proper post installation, you can find it here: More info about our deck services.
Step 2: Measuring, Cutting, and Attaching the Rails
With your posts firmly in place, it’s time to connect them with the top and bottom rails. Precision here is key for both aesthetics and structural integrity.
First, we measure the distance between each pair of installed posts for both the top and bottom rails. Remember to account for any brackets or connectors that will attach the rails to the posts; often, rails need to be cut about 1/16″ shorter than the actual opening to allow for a proper fit and bracket clearance. When cutting rails, use a circular saw with a blade appropriate for your material. If you’re cutting aluminum or other metal rails, always apply touch-up paint to any exposed metal to prevent corrosion.
Next, we attach the mounting brackets to the posts according to the manufacturer’s instructions. These brackets will cradle your rails.
Now, let’s install the bottom rail. We position it between the posts, ensuring it’s level and has proper ground clearance, often referred to as “sweep.” A common recommendation for sweep is about 3 inches from the deck surface, but always check your local codes. For longer rail spans (typically over 4 feet), we install support legs under the center of the bottom rail to prevent sagging. Secure the bottom rail to the brackets with appropriate screws.
Finally, we attach the top rail. We fit it into its brackets, ensuring it’s level and creates a snug fit. Applying pressure or gently tapping with a rubber mallet can help seat it properly. Secure the top rail to the brackets, using a bit extension for your drill if needed to avoid marking the rail surface.
Step 3: Installing Balusters and Infill
This step truly defines the look of your railing and, most importantly, provides the crucial safety barrier. Balusters, glass panels, or cable infill prevent falls and must adhere strictly to the 4-inch sphere rule.
For traditional balusters or pickets, consistent spacing is essential. A common spacing is 3-1/2 inches between balusters, which easily passes the 4-inch sphere test. We often use a scrap piece of wood cut to the desired spacing as a spacer block; this makes the process quick and ensures uniformity. Balusters are typically attached to the top and bottom rails with specialized connectors or screws. If using connectors, a dab of silicone caulk can prevent any rattling and add stability. Always pre-drill holes to prevent wood from splitting.
If you’ve opted for glass panels, installation involves careful placement. For these systems, the inside-to-inside post spacing is often wider than the glass panel itself (e.g., 6 inches wider for a 48-inch glass panel) to accommodate the mounting hardware. The panels slide into channels or are secured with clamps to the posts.
For cable railing, the process involves running stainless steel cables horizontally through pre-drilled holes in your posts. The cables are then tensioned using specialized hardware at the end posts. It’s vital to ensure the cables are taut and spaced correctly, as the maximum unsupported distance for cable railing wire is usually 48 inches. Proper tensioning is key to maintaining safety and preventing sagging.
No matter the infill, we always double-check for consistent alignment and spacing to ensure both safety compliance and a professional finish.
Step 4: Finishing Touches for a Professional Look
The final steps might seem small, but they bring the whole project together, adding durability and that polished, professional look we’re known for.
First, we secure the top handrail or cap rail. This component not only provides a comfortable grasp but also ties the entire railing system together structurally. Ensure it’s centered over the posts and securely fastened. If you have any corners, careful cuts ensure a seamless transition.
Next, we install the decorative post caps. These aren’t just for looks; they also protect the top of your posts from weather damage. For high wind areas, a clear silicone adhesive can be used around the inside of the post cap before sliding it on, adding extra security.
Finally, we perform a thorough “shake test” on each section of the railing to ensure it’s rock solid and meets all safety standards. Any wobbles indicate a need for further tightening or reinforcement. After confirming everything is secure, we clean up the work area, leaving your deck ready for enjoyment.
Advanced Topics and Common Pitfalls
While the basic steps cover most deck railing installation projects, some situations, like stairs or angled decks, require a bit more finesse. And even the most experienced DIYer can fall prey to common mistakes.
How to Handle Stairs and Angles
Installing railing on stairs is definitely a step up in complexity (pun intended!). Unlike level sections, stair railings need to follow the slope of the stairs while keeping balusters vertical. Many systems offer specialized stair panels that are shipped at a specific angle (e.g., 37°) but are adjustable within a range (e.g., 30-40°). It’s crucial not to over-adjust these, as it can lead to loose and rattling balusters.
We use adjustable stair brackets that allow the top and bottom rails to be secured at the correct angle. Measuring for stair rails involves accounting for these angles, often requiring precise calculations to ensure the balusters remain plumb. For a sleek look, some systems use specialized baluster connectors that pivot to maintain vertical alignment on a slope. If your deck has angled sections (e.g., a 45° corner), you’ll need specific clips (like 22.5° clips) to connect the railing sections seamlessly to the posts. These specialized components ensure both safety and a visually appealing transition.
Common Mistakes to Avoid During Your Deck Railing Installation
Even with the best intentions, mistakes can happen. Here are some common pitfalls we’ve seen and how to avoid them:
- Improper Post Attachment: This is the biggest safety concern. Never attach posts only to the decking. Always bolt them securely to the structural joists or rim joists. We can’t stress this enough!
- Forgetting to Check Codes: Building codes are there for a reason. Ignoring them can lead to failed inspections, fines, and unsafe conditions. Always verify local requirements in Columbus or Circleville, Ohio.
- Inconsistent Baluster Spacing: If a 4-inch sphere can pass through your balusters, your railing isn’t up to code. Use a spacer block to ensure consistent, compliant spacing.
- Incorrect Measurements: “Measure twice, cut once” is a mantra for a reason. Mistakes here lead to wasted materials and an unprofessional look. Take your time, double-check everything.
- Not Using Structural Blocking: For areas where joists aren’t directly available for post attachment, adding blocking (reinforcement between joists) is crucial for a strong railing. Don’t skip this step!
- Over-tightening Fasteners: Especially with composite or vinyl materials, over-tightening screws can strip threads or crack components. Use a drill with an adjustable clutch and avoid impact drivers for delicate fasteners.
After the Build: Maintenance and Knowing When to Call a Pro
Once your beautiful new deck railing is installed, the work isn’t entirely over. Like any part of your home, it benefits from a little care. And sometimes, the best decision is to let the experts handle it.
Maintaining Your New Deck Railing
The maintenance your railing needs will largely depend on the material you chose:
- Wood Railings: These require the most attention. We recommend regular cleaning, along with staining or sealing every 1-3 years to protect against moisture, UV damage, and rot. Keep an eye out for splinters or loose fasteners.
- Composite and Vinyl Railings: These are wonderfully low-maintenance. A simple wash with soap and water is usually all they need to stay looking great. They resist rot, insects, and fading, making them a popular choice for busy Ohio homeowners.
- Glass Panels: While offering stunning views, glass panels will need frequent cleaning to keep them sparkling and free of smudges or water spots.
- Cable Infill: Periodically inspect the cables for tension and cleanliness. A quick wipe-down and ensuring the tensioning hardware is secure will keep them looking sharp.
Regardless of material, it’s a good practice to perform a quick visual inspection of your entire railing system a couple of times a year. Check for any loose fasteners, wobbly posts, or signs of wear. Tightening a screw now can prevent a bigger problem later.
DIY vs. Hiring a Professional for Your Deck Railing Installation
Deciding whether to DIY your deck railing installation or hire a professional comes down to a few factors:
- Assessing Project Complexity and Your Skill Level: Simple, straight runs on a new deck might be manageable for an experienced DIYer. However, complex designs, stairs, angled sections, or working with specialized materials like glass or cable can quickly become challenging. Be honest about your carpentry skills and comfort level with power tools and precise measurements.
- Time Commitment: A project like this takes time—often 8-16 hours for a standard 14’x22′ deck with two workers, assuming intermediate carpentry skills. Can you realistically dedicate that time?
- The Value of Experience for Safety and Compliance: This is where a professional truly shines. We understand the nuances of local codes, know the best practices for structural integrity, and have the tools and experience to ensure a safe, compliant, and beautiful installation. Our team handles these projects every day across Ohio, from Columbus to Circleville.
- When to Find a Deck Railing Installation Expert: If you’re tackling a complex design, feeling unsure about code requirements, or simply don’t have the time or specialized tools, hiring a professional is a smart investment. It ensures peace of mind, a flawless finish, and, most importantly, a safe deck for your family and friends. With Kyline Consulting, you’re getting 40+ years of experienced professionals ensuring quality, safety, and free, no-obligation estimates.
Your Deck Railing Questions Answered
What is the most important rule for deck railing safety?
Adhering to local building codes is paramount, especially for railing height (typically 36 or 42 inches) and ensuring a 4-inch sphere cannot pass between balusters. These rules are designed to prevent falls and protect everyone using your deck.
How far apart should deck railing posts be?
Most building codes mandate that posts be spaced no more than 6 feet apart on center. However, you should always confirm with your local building authority here in Ohio, as specific requirements can vary slightly.
Can I attach railing posts directly to the deck boards?
No. For a safe and secure railing, posts must be bolted through the deck’s structural frame (the joists or rim joists), not just the surface decking. Attaching posts only to the decking will not provide adequate support and creates a significant safety hazard.
Final Thoughts on Your Deck Project
We’ve covered a lot about deck railing installation, from understanding codes and choosing materials to the step-by-step process and crucial safety tips. A well-planned and executed railing isn’t just about meeting requirements; it’s about creating a safe, functional, and beautiful extension of your home. The right railing improves curb appeal, adds value, and gives you peace of mind.
If you’re a DIY enthusiast, we hope this guide empowers you to tackle your project with confidence. For those who prefer to leave it to the experts, our team at Kyline Construction LLC is ready to bring our 40+ years of experience to your deck project. We pride ourselves on precision craftsmanship, ensuring quality and safety in every installation.
Ready to discuss your deck project, get a free, no-obligation estimate, or just have a few more questions? Don’t hesitate to reach out to us! Contact Us to discuss your deck project