What You Need to Know Before Starting a Siding Installation Project
Siding installation is one of the most impactful home improvement projects you can take on — it protects your home from the elements, improves curb appeal, and directly affects your property value.
Here’s a quick overview of what most Central Ohio homeowners need to know:
| Topic | Quick Answer |
|---|---|
| Typical project cost | $11,000 – $17,000 for a full siding replacement |
| Vinyl siding cost per sq ft | $3 – $7 per sq ft installed |
| Window trim (per window) | $400 – $900 |
| Project timeline | 7 – 14 days for a typical tear-off and re-side |
| Best material for most homes | Vinyl siding — affordable, low-maintenance, and durable |
| Biggest mistake homeowners make | Hiring the wrong contractor |
But here’s the thing — the cost of siding installation is only part of the picture. The real risk is a bad install. Vinyl siding that’s nailed too tight, or a substrate that wasn’t prepped correctly, will buckle, leak, and fail years before it should.
Knowing what a proper installation looks like — and what a fair price actually is — puts you in control.
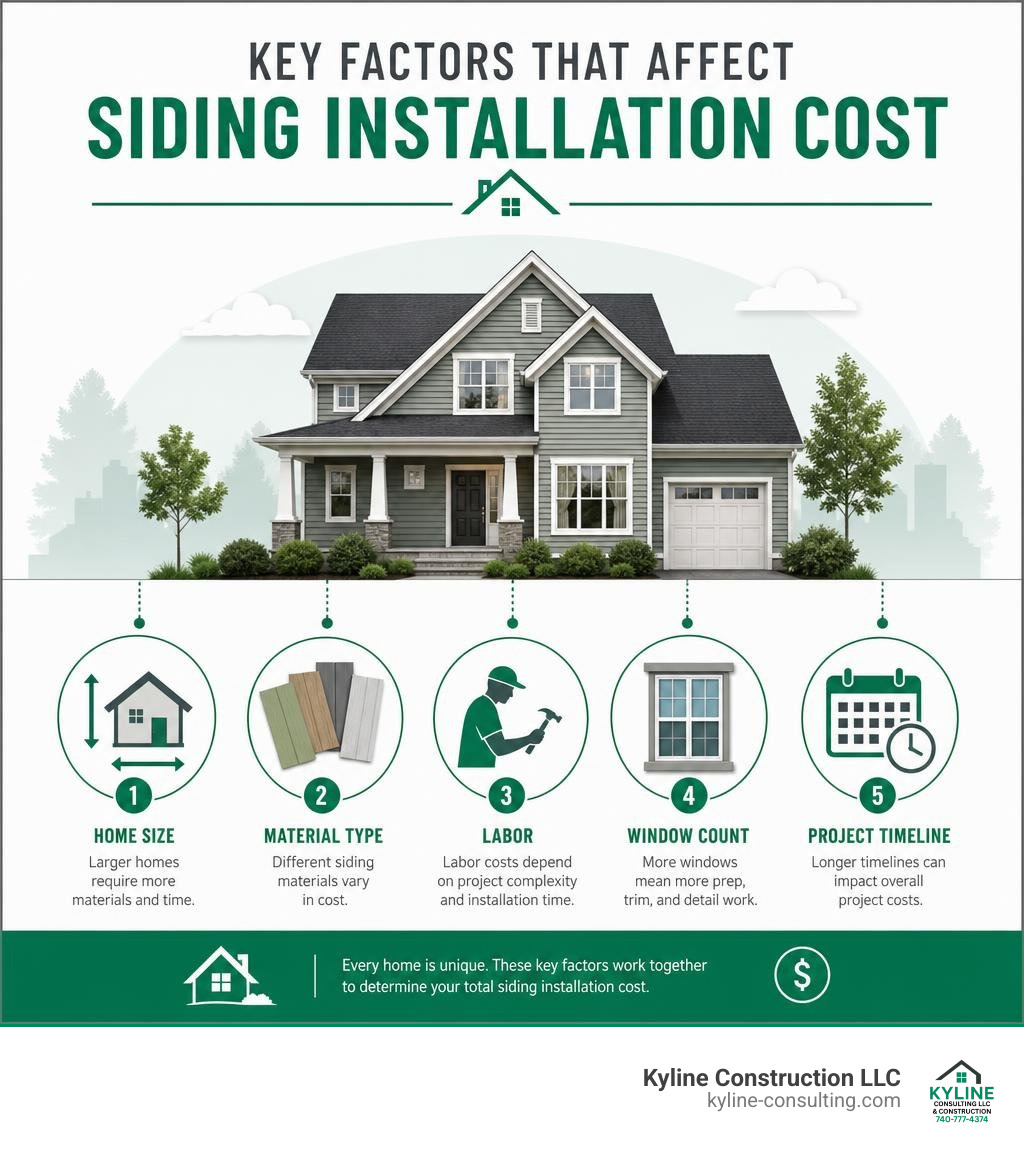
Understanding the Real Cost of Siding Installation
When we sit down with homeowners in Columbus or Circleville to discuss a siding installation project, the very first question is almost always about the bottom line. It makes complete sense. Your home is your biggest investment, and you want to budget carefully.
To understand where your hard-earned money goes, we have to break the project down into its two primary components: materials and labor. Generally, a professional siding job is split roughly 40% for materials and 60% for professional labor and overhead.
When you receive an estimate, you will notice we do not talk in simple square footage. Instead, the siding industry uses a term called a “square.” One square is equal to 100 square feet of wall surface. For example, if your home has 2,000 square feet of exterior wall space to cover, that translates to 20 squares of siding.
Calculating the raw wall area is only the starting point. A professional estimator must also factor in a waste allowance. We typically add a 10% waste allowance to the order. This extra material is necessary because we have to cut panels to fit around windows, doors, and the angles of your gables. Without this buffer, we would run out of material before the job is finished.
For a realistic look at how these numbers translate to a real-world budget, vinyl siding generally costs between $3 and $7 per square foot installed in our local Central Ohio market. If you are budgeting for a standard-sized family home, a full replacement or deep repair project typically ranges from $11,000 to $17,000. Additionally, replacing or wrapping the trim around your windows usually runs between $400 and $900 per window, depending on the size and complexity of the casing.
For a deeper dive into how these line items are calculated, check out Your Guide to Siding Replacement Costs. Understanding these metrics keeps you from being surprised when the final estimate lands on your kitchen table.
Choosing the Right Materials: Vinyl vs. Composite Siding
Choosing the right material for your siding installation is a balance of upfront cost, long-term durability, and how much weekend maintenance you are willing to do. In our region, the two most popular options we install are vinyl siding and composite siding.
Vinyl siding remains the undisputed champion for value. It is incredibly budget-friendly — roughly 1/3 the cost of composite or fiber cement alternatives. It is also virtually maintenance-free. You do not have to paint it, scrape it, or seal it. A simple wash with a garden hose once a year is usually all it takes to keep it looking fresh. Modern premium vinyl is engineered with advanced UV stabilizers to resist fading and can withstand gale-force winds up to 190 MPH. It typically carries a solid manufacturer’s warranty and has an expected lifespan of 20 to 30 years.
On the other hand, composite siding is a premium alternative. Made from a blend of wood fibers, polymers, and resins, composite siding offers a incredibly realistic wood-grain texture and superior impact resistance. Because of its dense composition, it boasts a lifespan of 25 to 50 years. However, composite requires specialized tools and techniques to install. For instance, while vinyl can be scored and snapped or cut with simple hand snips, composite siding boards must be cut using circular saws equipped with carbide-tipped blades.
Here is a quick comparison table to help you visualize the differences:
| Feature | Premium Vinyl Siding | Premium Composite Siding |
|---|---|---|
| Average Lifespan | 20 to 30 Years | 25 to 50 Years |
| Upfront Cost | Low ($3 – $7 per sq ft installed) | High ($12 – $18+ per sq ft installed) |
| Maintenance | Extremely Low (Wash with hose) | Low (Occasional inspection/cleaning) |
| Material Thickness | Light & Flexible (.040″ – .046″) | Heavy & Rigid |
| Cutting Method | Hand Snips / Utility Knife | Circular Saws (Carbide-tipped) |
| Wind Resistance | Excellent (Up to 190 MPH) | Superior |
To explore all your options and see which material aligns best with your home’s architecture and your personal budget, take a look at our comprehensive guide on All About Siding Options and Costs.
The Technical Side: Proper Preparation and Installation Techniques
_compressed.webp?alt=media&token=90f67788-c7dc-44db-b596-7f0a42419719 "Contractor leveling beige vinyl siding panels during proper siding installation")
Now, let’s talk about the actual science of siding installation. Siding is not a completely watertight barrier. Its primary job is to shed the vast majority of rain and snow, acting as a beautiful rain screen. The real protection happens behind the panels.
Before a single piece of siding is hung, the wall substrate must be perfectly prepped. We start by stripping away the old, damaged siding to inspect the underlying wood sheathing. Any rotted wood must be removed and replaced. Once we have a smooth, flat, and structurally sound surface, we install a high-quality water-resistive barrier (WRB), commonly known as house wrap. This wrap is designed to keep liquid water out of your framing while allowing moisture vapor from inside the home to escape, preventing harmful mold and rot.
The most critical rule of vinyl siding installation is allowing for natural thermal expansion and contraction. Vinyl is a thermoplastic material. In our Central Ohio climate — where we experience freezing winters and hot, humid summers — a standard 12-foot-6-inch vinyl panel can expand and contract by 1/2 inch or more over the course of the year!
If you nail vinyl siding tightly to the wall, it cannot move. When the summer sun hits it, the trapped panel will buckle, warp, and create ugly ripples across the side of your house.
To prevent this, professional installers follow strict guidelines outlined in the industry standard INSTALLATION MANUAL :
- Fastener Penetration: Nails must penetrate a minimum of 1 1/4 inches into nailable material, such as wood sheathing and framing studs, to ensure they hold fast against high winds.
- The Dime-Width Gap: Never drive the nail flush against the siding hem. Always leave about 1/32 of an inch of clearance — roughly the thickness of a dime — between the nail head and the vinyl. The panel should be able to slide back and forth easily with your hands.
- Center Nailing: Always drive your fasteners directly into the center of the pre-punched nail slots. Nailing at the very end of a slot pinches the panel and stops its movement.
Key Steps in a Professional Siding Installation
A beautiful, straight siding job is built from the ground up. We follow a highly systematic process to ensure every line is perfectly level and secure:
- The Starter Strip: We establish a perfectly level chalk line around the entire base of the home. The starter strip is fastened along this line, keeping it slightly above the lowest wall point. This strip acts as the locking foundation for your very first course of siding.
- Corner Posts: Next, we install the outside and inside corner posts. Unlike horizontal panels, vertical accessories like corner posts must be hung from the very top of their uppermost nail slots to let them dangle naturally, then fastened loosely down the rest of the slots every 8 to 12 inches.
- J-Channels and Trim: We install J-channels around all windows and doors. The J-channel hides the cut ends of the siding panels and channels water away from the openings.
- Hanging the Panels: We lock the first panel into the starter strip and work our way up. We ensure each panel is fully locked into the course below it but never stretched or forced upward.
- Horizontal vs. Vertical Panels: While horizontal siding is the classic choice, vertical siding (like board-and-batten) is fantastic for gables or accent walls. Vertical installation requires different starter components and solid horizontal furring strips or sheathing behind it to ensure proper fastening every 12 inches.
Avoiding Common Mistakes During Siding Installation
Because DIY siding projects can go wrong quickly, it helps to know the classic mistakes that lead to premature failure.
The absolute worst sin in siding is “face-nailing” — driving a nail directly through the visible face of a panel instead of utilizing the hidden nail hem. This completely locks the panel in place, guarantees ugly buckling, and voids your product warranty.
Another common mistake is caulking the joints where horizontal panels overlap, or caulking the panels where they slide into the J-channels. Doing this seals the expansion gaps, traps moisture, and causes the vinyl to warp.
If a mistake does happen, or if a rogue lawnmower rock cracks a panel years down the road, a real contractor does not need to tear down the whole wall. We use a specialized tool called a “zip tool.” This simple, curved metal tool slides right under the locking edge of the panel above the damaged piece, hooks onto the lock, and allows us to safely unzip the panels to expose the nails, swap out the broken piece, and lock it back up in minutes.
Hiring a Contractor: Paper Contractors vs. Real Contractors
_compressed.webp?alt=media&token=19643b94-8319-45e4-aa4e-fbe18fe9b93d "Vinyl siding replacement in progress with exposed OSB sheathing and beige siding on a residential home")
When you are investing thousands of dollars into your home’s exterior, the contractor you choose matters just as much as the material you buy. In the home improvement industry, there is a massive, hidden divide that homeowners rarely discover until it is too late: the difference between “paper contractors” and “real contractors.”
A paper contractor is essentially a sales organization. They have beautiful offices, high-pressure sales pitches, and slick marketing. But once you sign the contract, they simply flip your job to the cheapest, unvetted subcontractor they can find on Craigslist. The person who sold you the job will never step foot on your property again. If those subcontractors walk off the job because of a dispute, or if they do a subpar job, the paper contractor has no physical ability to fix it themselves. They do not know how to swing a hammer.
This distinction is critical because a paper contractor lacks the technical expertise to oversee a specialized vinyl siding installation. They cannot verify if the vinyl is being hung with the proper dime-width gap or if the starter strips are perfectly level. They simply hope for the best while pocketing a massive markup.
A real contractor, like our team at Kyline Construction LLC, is built on hands-on craftsmanship. Yes, we work with trusted, highly skilled crews, but we are construction professionals first. If a crew member gets sick, or if a subcontractor unexpectedly quits mid-job, a real contractor has the tools, the skills, and the decades of personal experience to step onto the scaffolding and finish your siding installation personally.
We manage our projects with daily on-site supervision, clear communication, and deep local expertise. We know how the wild Central Ohio weather affects wood sheathing, and we understand local building codes inside and out. Choosing a real contractor means you are paying for actual expertise and accountability, not just a middleman’s sales commission.
To make sure you are not paying premium prices for outsourced, low-quality labor, read our guide on Don’t Get Sided Tracked: Understanding Your Siding Replacement Labor Bill. It will give you the exact questions to ask to smoke out paper contractors before you sign on the dotted line.
Frequently Asked Questions about Siding Costs
How long does a typical siding replacement project take?
For a standard single-family home in Central Ohio, a complete tear-off of old materials and a brand-new siding installation typically takes between 7 and 14 days.
This timeline can fluctuate based on a few key factors:
- The Weather: Heavy rain, high winds, or extreme winter cold can temporarily halt installation to protect your exposed home and ensure crew safety.
- Unexpected Repairs: If we uncover hidden rot, structural insect damage, or water damage once the old siding is removed, we must repair those structural issues before installing the new siding.
- Home Complexity: Multi-story homes, steep gables, and homes with a high number of windows require more intricate cutting and scaffolding setup, which adds a bit of time to the schedule.
How do I know if my siding estimate is fair?
A fair, professional estimate should never be a single, lump-sum number scribbled on a piece of paper. It should be a highly detailed, transparent breakdown.
Look for these specific elements:
- Clear Scope of Work: It should clearly state whether the price includes tearing off and disposing of the old siding, or if they are planning to go over existing materials (which we do not recommend).
- Material Specifications: The estimate should name the exact brand, style, thickness, and color of the vinyl siding being used.
- Detailed Line Items: You should see separate costs for siding squares, window wraps, trim accessories, and house wrap.
If you want to evaluate an estimate you’ve already received to see if it makes sense for our local market, check out Is Your Siding Estimate Too High? A Homeowner’s Guide to Fair Pricing.
Can I install vinyl siding directly over my old siding?
While some budget contractors might offer to install new vinyl siding directly over your old wood siding to save on labor, we strongly advise against it.
Tearing off the old siding is the only way to inspect the wall substrate for hidden rot, mold, or structural damage. If you cover up rotting wood, the moisture will remain trapped, the rot will spread, and your new vinyl siding will eventually sag and fail.
Additionally, old siding is rarely perfectly flat. Installing new vinyl over an uneven surface will result in a wavy, unprofessional appearance that ruins your home’s curb appeal. Starting with a clean, level, and fully repaired substrate is the only way to ensure a beautiful, long-lasting result.
Conclusion
At the end of the day, a siding installation is about more than just putting new plastic on your walls — it is about protecting your home, your family, and your peace of mind for decades to come.
At Kyline Construction LLC, we bring over 40 years of hands-on, professional contracting experience to every single home we touch in Columbus, Circleville, and across Central Ohio. We do not believe in high-pressure sales tactics or cutting corners. Instead, we focus on precision craftsmanship, transparent pricing, and treating your home as if it were our own.
If you are ready to transform your home’s exterior with beautiful, durable vinyl siding, we would love to help. We offer completely free, no-obligation estimates to help you plan your project with confidence.
Visit our Siding Services Page today to schedule your consultation, and let’s build something great together!